17
2017Our aim is simply lighting up a single led using Raspberry Pi.
What we’re gonna need :
- Led
- Resistor (I use 330 Ω)
- 2 male to female jumper cable
- Breadboard
- Raspberry Pi and all its bits and pieces

A little theory about breadboard, before we start :
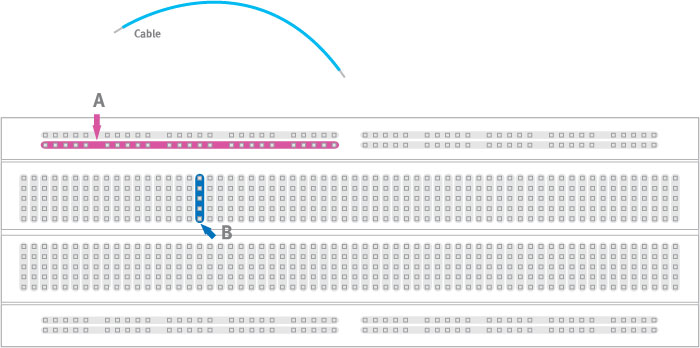
All the holes in row A are internally connected. And all the holes in column B are also internally connected. To interconnect the row A and column B, we use jumper cables. Learn more about it here.
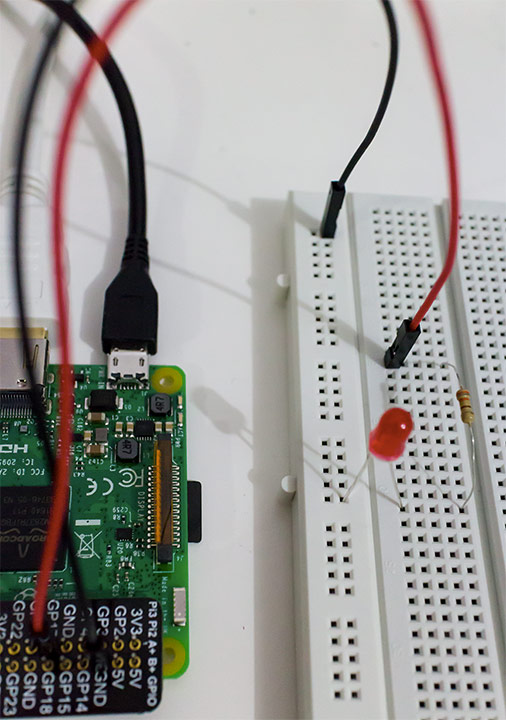
Basically this is how we’re going to wire them up :
- Plug the black jumper cable the GND pin on the Raspberry Pi
- Plug the other end to the top row of the breadboard
- Plug the short leg of the Led to one of the hole located in the same row as the black jumper cable
- Plug the long leg of the Led to any hole in the middle part of the breadboard
- Plug one end of the resistor to a hole in the same column as the long leg of the Led
- Plug the other end of the resistor to another column
- Plug the the red jumper cable to a hole located in the same column as one end of the resistor
- Plug the other end of the red jumper cable to the GPIO 17 pin of the Raspberry Pi
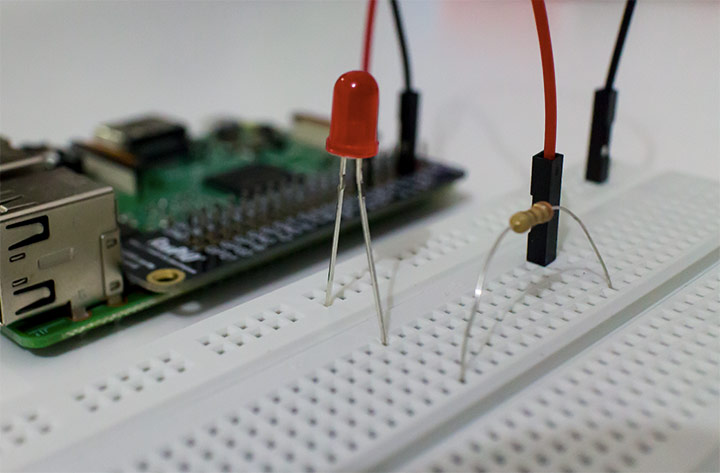
from another angle,
Now connect the monitor, keyboard, mouse, and power supply to the Raspberry Pi, and turn it on.
We’re going to use a programming application called Scratch to control the on and off of the Led. To be able to use the GPIO pins, we need to start the GPIO server by clicking Edit menu and Start GPIO server.
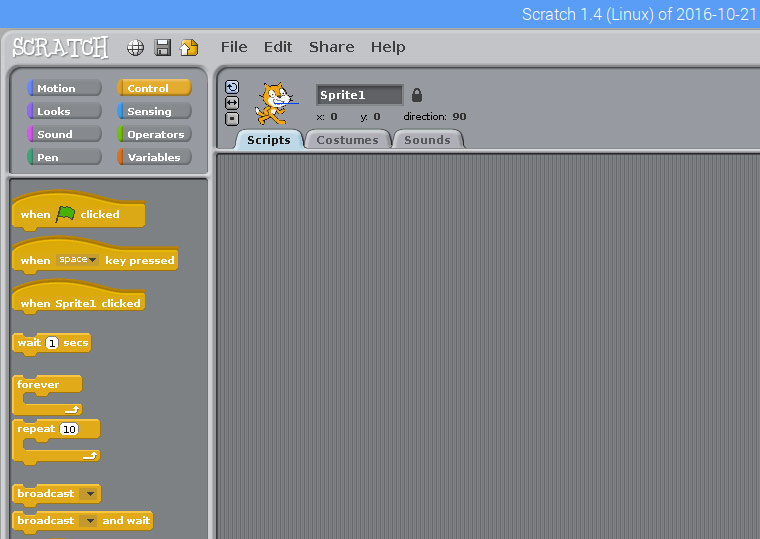
Drag and drop “when space key pressed” control to to the Scripts area. This way, a press of the space bar on the keyboard will trigger an action.

Get “broadcast” control and plug it to the “when space key pressed” control. Change the broadcast value to “gpio17on”. This will tell the GPIO17 of the Raspberry Pi to light up the Led.
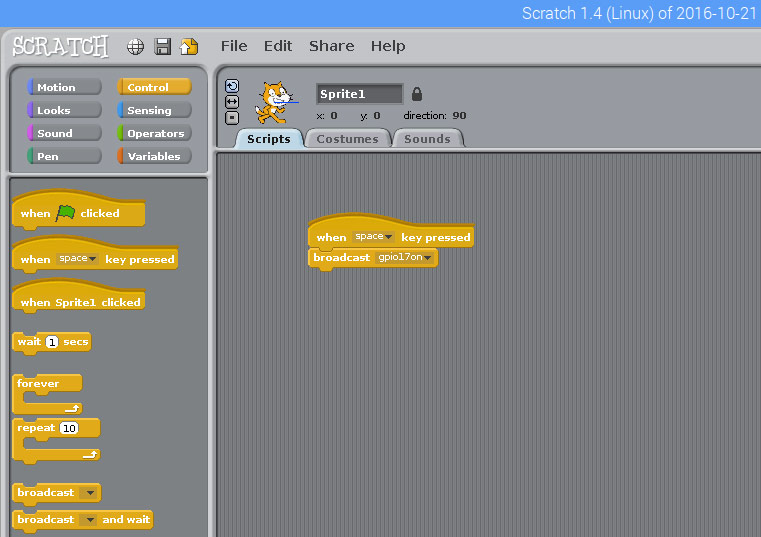
Plug the “wait 1 secs” control and the “broadcast” control to the two earlier controls. Change the broadcast value to “gpio17off”. This means that the Led will be off 1 second after it is turned on.

Our programming is done. Now press the space bar on the keyboard,
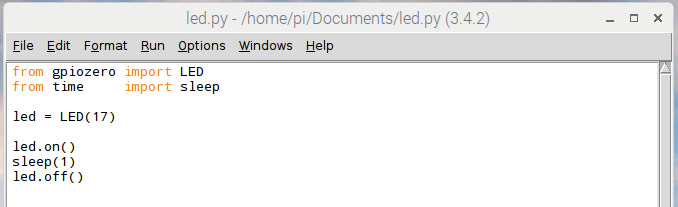
We can also achieve similar result by doing a little programming using Python. Start Python 3 application, and create a new file. Put this code in the file and save it as led.py :
Open the terminal application, and execute below command :

We have said Hello to the world of Raspberry Pi!


Recent Comments