03
2017After all the required components for Raspberry Pi are gathered, it is time to give it some operating system. Raspbian, a version of GNU/Linux, is the recommended operating system to be installed on the Raspberry Pi.
![]()
How I got the Raspbian installed
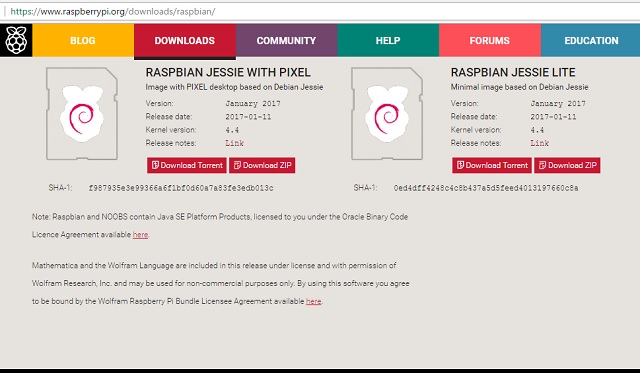
Raspberrypi.org provides the image file of Raspbian OS. You just need to download it from the website, and burn the image file on the micro SD card.
- Visit the download page of Raspberrypi.org.
- Click on RASPBIAN.
- I chose to download RASPBIAN JESSIE WITH PIXEL (image with PIXEL desktop based on Debian Jessie).
- Unzip the downloaded file.
- To burn the image file on the micro SD card, I used a program called Etcher. We can download it from etcher.io website.
- Once Etcher is installed, run it. Select the downloaded image file, and select the drive in which the micro SD is located. Then click Burn!
- The micro SD card is now loaded with Raspbian OS.
Other way of installing Raspbian
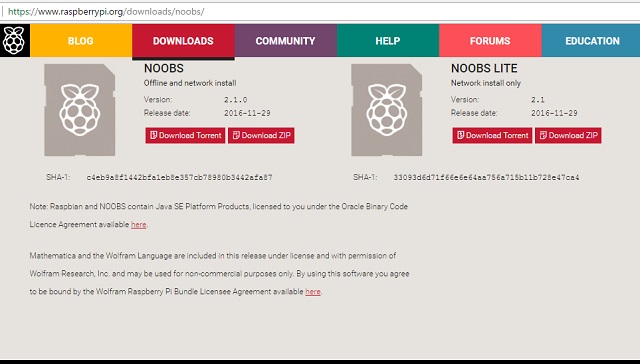
If you’ve never played around with Linux before, then you can use NOOBS (New Out Of the Box Software) for installing Raspbian. You can purchase micro SD card with the NOOBS preloaded, or download the NOOBS from Raspberrypi.org website.
Preparing NOOBS on micro SD card :
- First, we need to format the micro SD card.
- Download SD Formatter program, and install it.
- Format the micro SD card using the program.
- Visit the download page of Raspberrypi.org
- Click on NOOBS.
- Download NOOBS and unzip the file.
- Transfer the extracted files to the micro SD card.
- The micro SD now contains the required files for OS installation.
Putting the hardware and software together
- Put the micro SD card into the available slot on the Raspberry Pi board. The slot for micro SD card is located on the bottom of the board.
- Connect the keyboard and mouse to the available usb ports.
- Connect the monitor to the hdmi port. If the monitor only has vga port, then you need to get the vga-to-hdmi adapter cable.
- Connect the power supply to the micro USB port of the board, and plug the other end of the cable to the power outlet.

- The system will directly boot to the Raspbian desktop environment, if you download the Raspbian image and burn it on the micro SD card.
- If you use NOOBS, then the system will pop up a selection of operating systems. You will just select Raspbian and click install. Once the installation is done, you will be directed to the Raspbian desktop environment.
![]()
There we go. We have a small computer with desktop environment. It comes with office tools, internet tools, programming tools, games, and so on.


IKusuma
Bravo for the successful RP setup.. 👍👍